Have you ever pushed some code with a bad commit message and wished you could go back in time and edit it? Perhaps you got two different commits mixed up, or maybe your commit message was insufficiently descriptive. Either way, bad commit messages are no good to anyone – you never know when you might need to check out a commit, and hunting through past commits for an elusive chunk of code can be a nightmare. Your future self won’t thank you for it!
What if you need to do more than just edit a commit message? There are plenty of times I’ve accidentally included the wrong file in a commit, or else missed one change and had to push an extra commit to rectify it.
With Git, there are ways we can go back and edit our past commits. We can change the commit message, or add or remove files if we need to. Let’s look at a few ways to do just that.
Amending your last commit
If the commit you want to change is the very last one you made, and the commit hasn’t been pushed yet, then amending it is very simple. Just type:
git commit --amend
If you run this with the -m flag, you can edit your commit message in the terminal at the same time:
git commit --amend -m "Edited commit message"
Then edit your commit message, save the commit, and push your code to the repository. You can also add or remove files by making those changes before executing the amend command. Here of code we’re adding the file README.md and removing the file wrong-file.md, then editing the commit message:
git add README.md
git rm wrong-file.md
git commit --amend -m "Edited commit message"
You could also make changes to your last commit (such as adding or removing files) without changing the commit message:
git add README.md
git rm bad-file.md
git commit --amend --no-edit
Amending older commits
But what if you’ve already pushed your commit, or even if it’s a few commits back? Happily, there’s a fairly straightforward way to edit your past commit messages – assuming you know which commit the one you want to edit is. We’ll need to use the rebase command – but first, let’s try to understand a little bit about it.
Travelling through time
Using Git is a bit like having access to our own time machine. We can move backwards and forwards on our timeline by checking out different commits. If we’re working in a team we might have lots of people working on their own separate timelines (Git branches), and sometimes their timelines might converge with our own (merging), but time is basically linear. If you commit some bad code you can always go back in time to before it happened. With every commit you’re adding some more steps to the timeline – so if something goes wrong, you haven’t lost all that great work you did. Pretty cool!
Rebasing
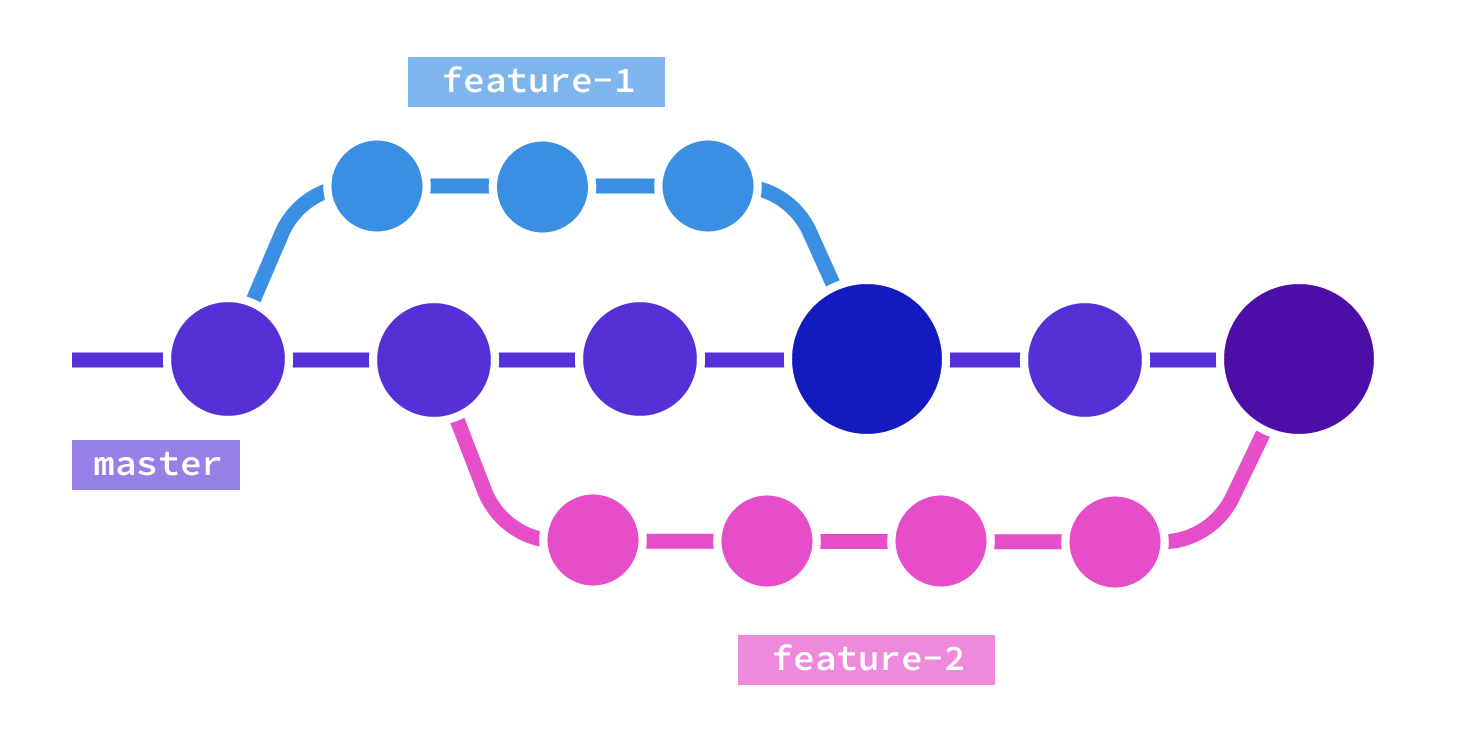
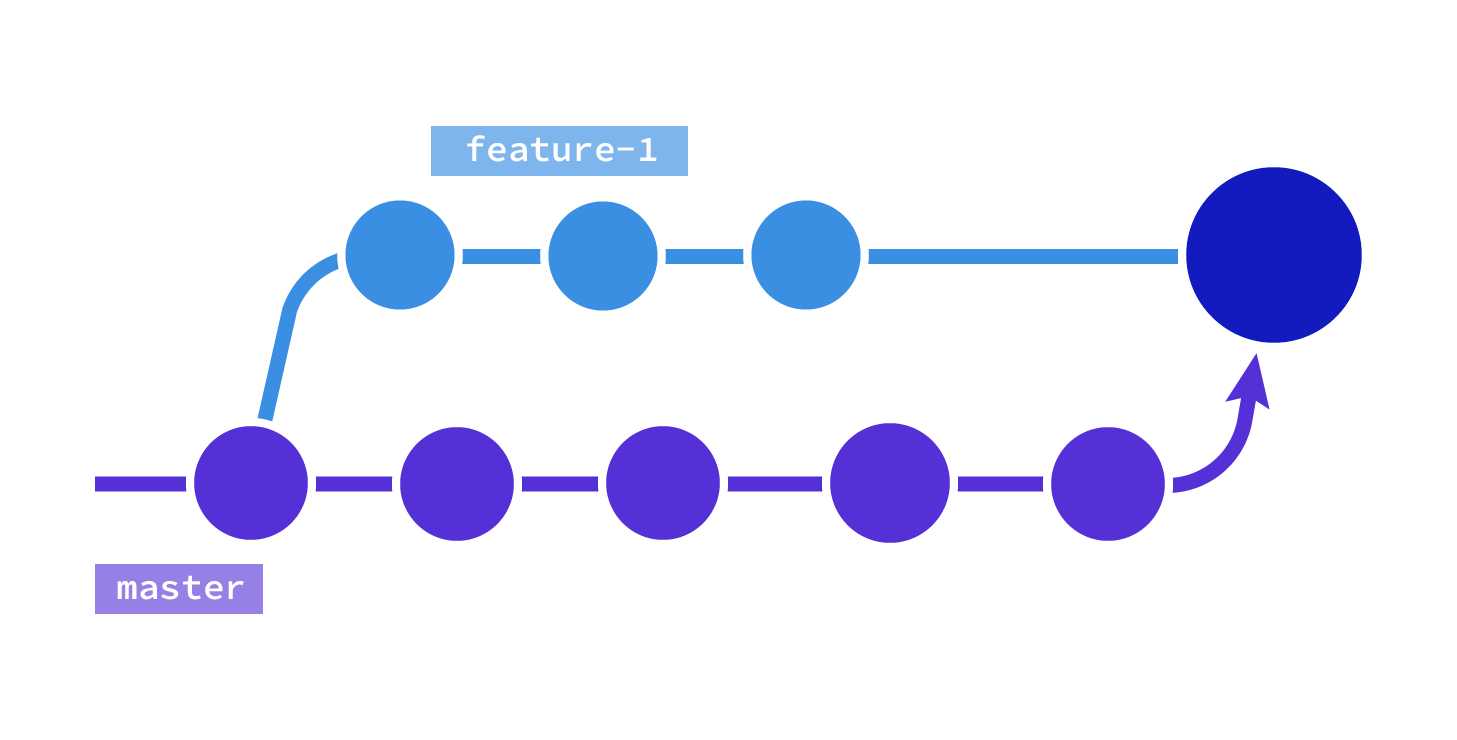
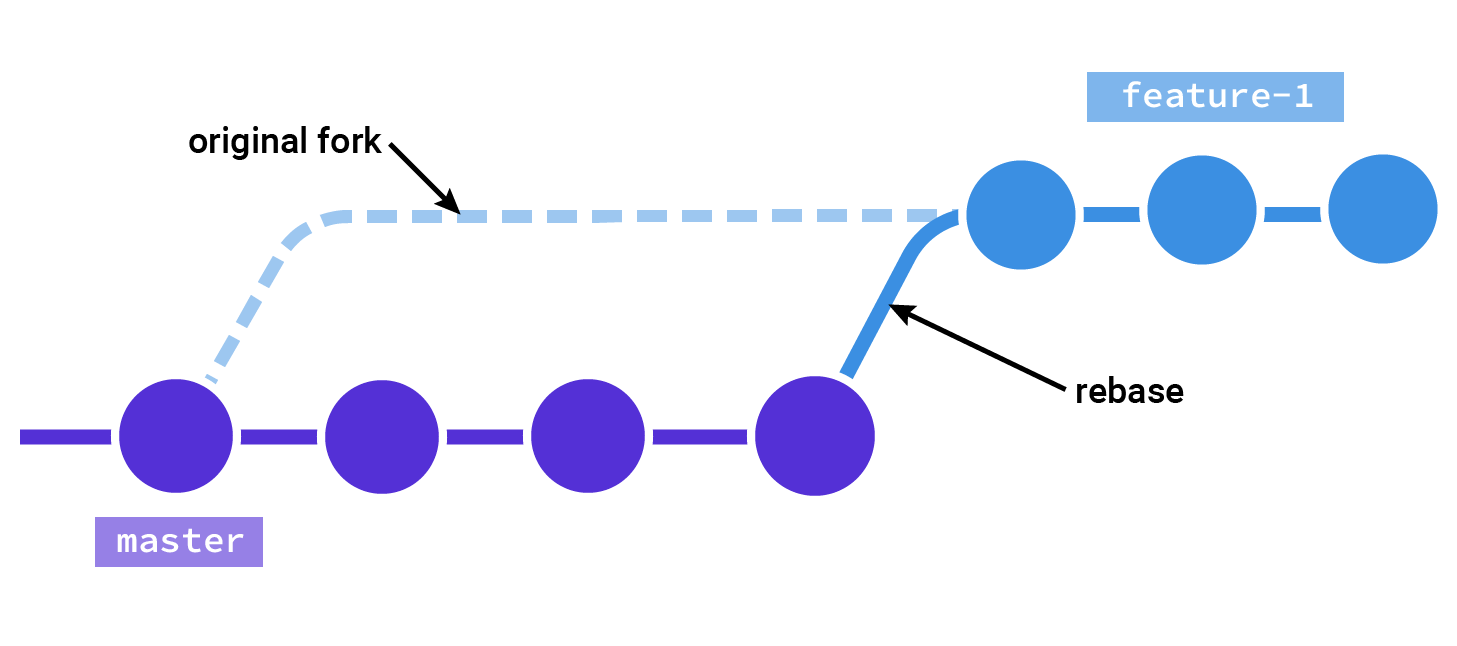
Rebasing is the process of moving the base of your branch upstream. If you’ve based your current feature branch off of the master branch and the master branch has since moved on because of other contributions, then you can perform a rebase to ensure you have the latest changes from master on your current branch. You could use git pull or git merge, but this would result in a single (potentially very large) commit being tacked onto your branch’s history at the point you pull those changes. With rebasing, we insert the extra commits from the master branch into our timeline, so it looks like they were there all along.
Rebasing opens up some other dimensions for us. Time is no longer linear – rebasing takes us into the world of the multiverse. We can actually change history. That is to say, we can go back, change (or remove) a commit and it’s like it never happened. Our past, present and future will be like that commit never existed at all. If you’ve watched the Netflix series Russian Doll, perhaps you can see how different timeline can operate in parallel! Let’s look at how this great and terrible superpower can be useful.
Keeping a clean history
You might think it’s great to have a linear timeline where everything that has ever happened is recorded and set in stone. But keeping a clean Git history has advantages. It can make it much quicker and easier to look back and see the chunks of work that was done on a project or feature, which is useful if you’re reviewing a team’s code contributions. It can make it simpler to locate and fix bugs too as it’s less likely you’ll need to wade through irrelevant commits.
Editing the timeline
The git rebase command has two modes: manual and interactive. To edit our past commits we have to do an interactive rebase. We’ll need to know how many commits back we need to go (relative to the HEAD, or current commit). Let’s say that the third from last commit is the one we want to edit. Type the following into your terminal:
git rebase -i HEAD~3
This will bring up a list of the last three commits. For example:
pick cd16d77 Adding .gitignore
pick 67c91dc Adding README.md
pick 1ba6af9 Removing unneccessary imports
Alternatively, if you know the commit ID, you could target that instead:
git rebase -i cd16d77
You’ll notice each commit has the word pick next to it. We need to change this to reword. Use the i key as a shortcut for insert mode, which will allow us to edit the text. Then you can change the actual text of the commit message alongside it.
If you want to change not only the commit message, but the content of the commit itself, you can use edit instead of reword. You’ll notice there are some other options too, including drop to remove a commit entirely. (These also have their short commands: d for drop, r for reword, etc.)
One you’re happy with your commit, hit escape to exit insert mode, then type :wq to exit the Git editor.
If you haven’t yet pushed your bad commit, then we don’t need to do anything further. Otherwise, we’ll need to force push. If, like me, you’re a bit scared of Git, then force-pushing is just about the scariest thing you can do. You’re re-writing Git history. But lets face our fears together!
First, a caveat: force-pushing is only something you should do on your own branch. If you force push to a shared branch then you’re rewriting the history for other people too, and they will have to resolve this locally, potentially causing big headaches. (This is why it’s a really good idea to work on separate branches!). If you’re happy that no-one else is going to be affected then you can go ahead and run:
git push --force
When rebasing the HEAD will automatically be reset to the latest commit, so we’re done – we’ll already have the most up-to-date version of our project to continue working on.
So there you go, we’ve rewritten history and the world didn’t end! If you’re interested in learning more, Atlassian has some great tutorials, including this one about rebasing and rewriting history.
I’m trying to learn more about Git and would love to hear your tips! If you have something to share, please let me know on Twitter @CSSInRealLife.
I made a small repository that I’m using to play around with Git while I’m learning, that also includes a handful of commands and explanations, which I’m adding to over time. Feel free to fork it and use it for your own Git practise (e.g. by adding files to the playground directory), or create a pull request if you have some useful things to add!
Webmentions for this page
About webmentionsLikes: 7
Reposts: 1
Mentions: 2
-
@michelle git flow plus feature branches pull request?
- Dohány Tamás -
@michelle My favorite type of blog post—a gift to your future self
- Mark Llobrera